QUANTUM OPTICS TREASURE HUNT
Recreate the Virtual Lab
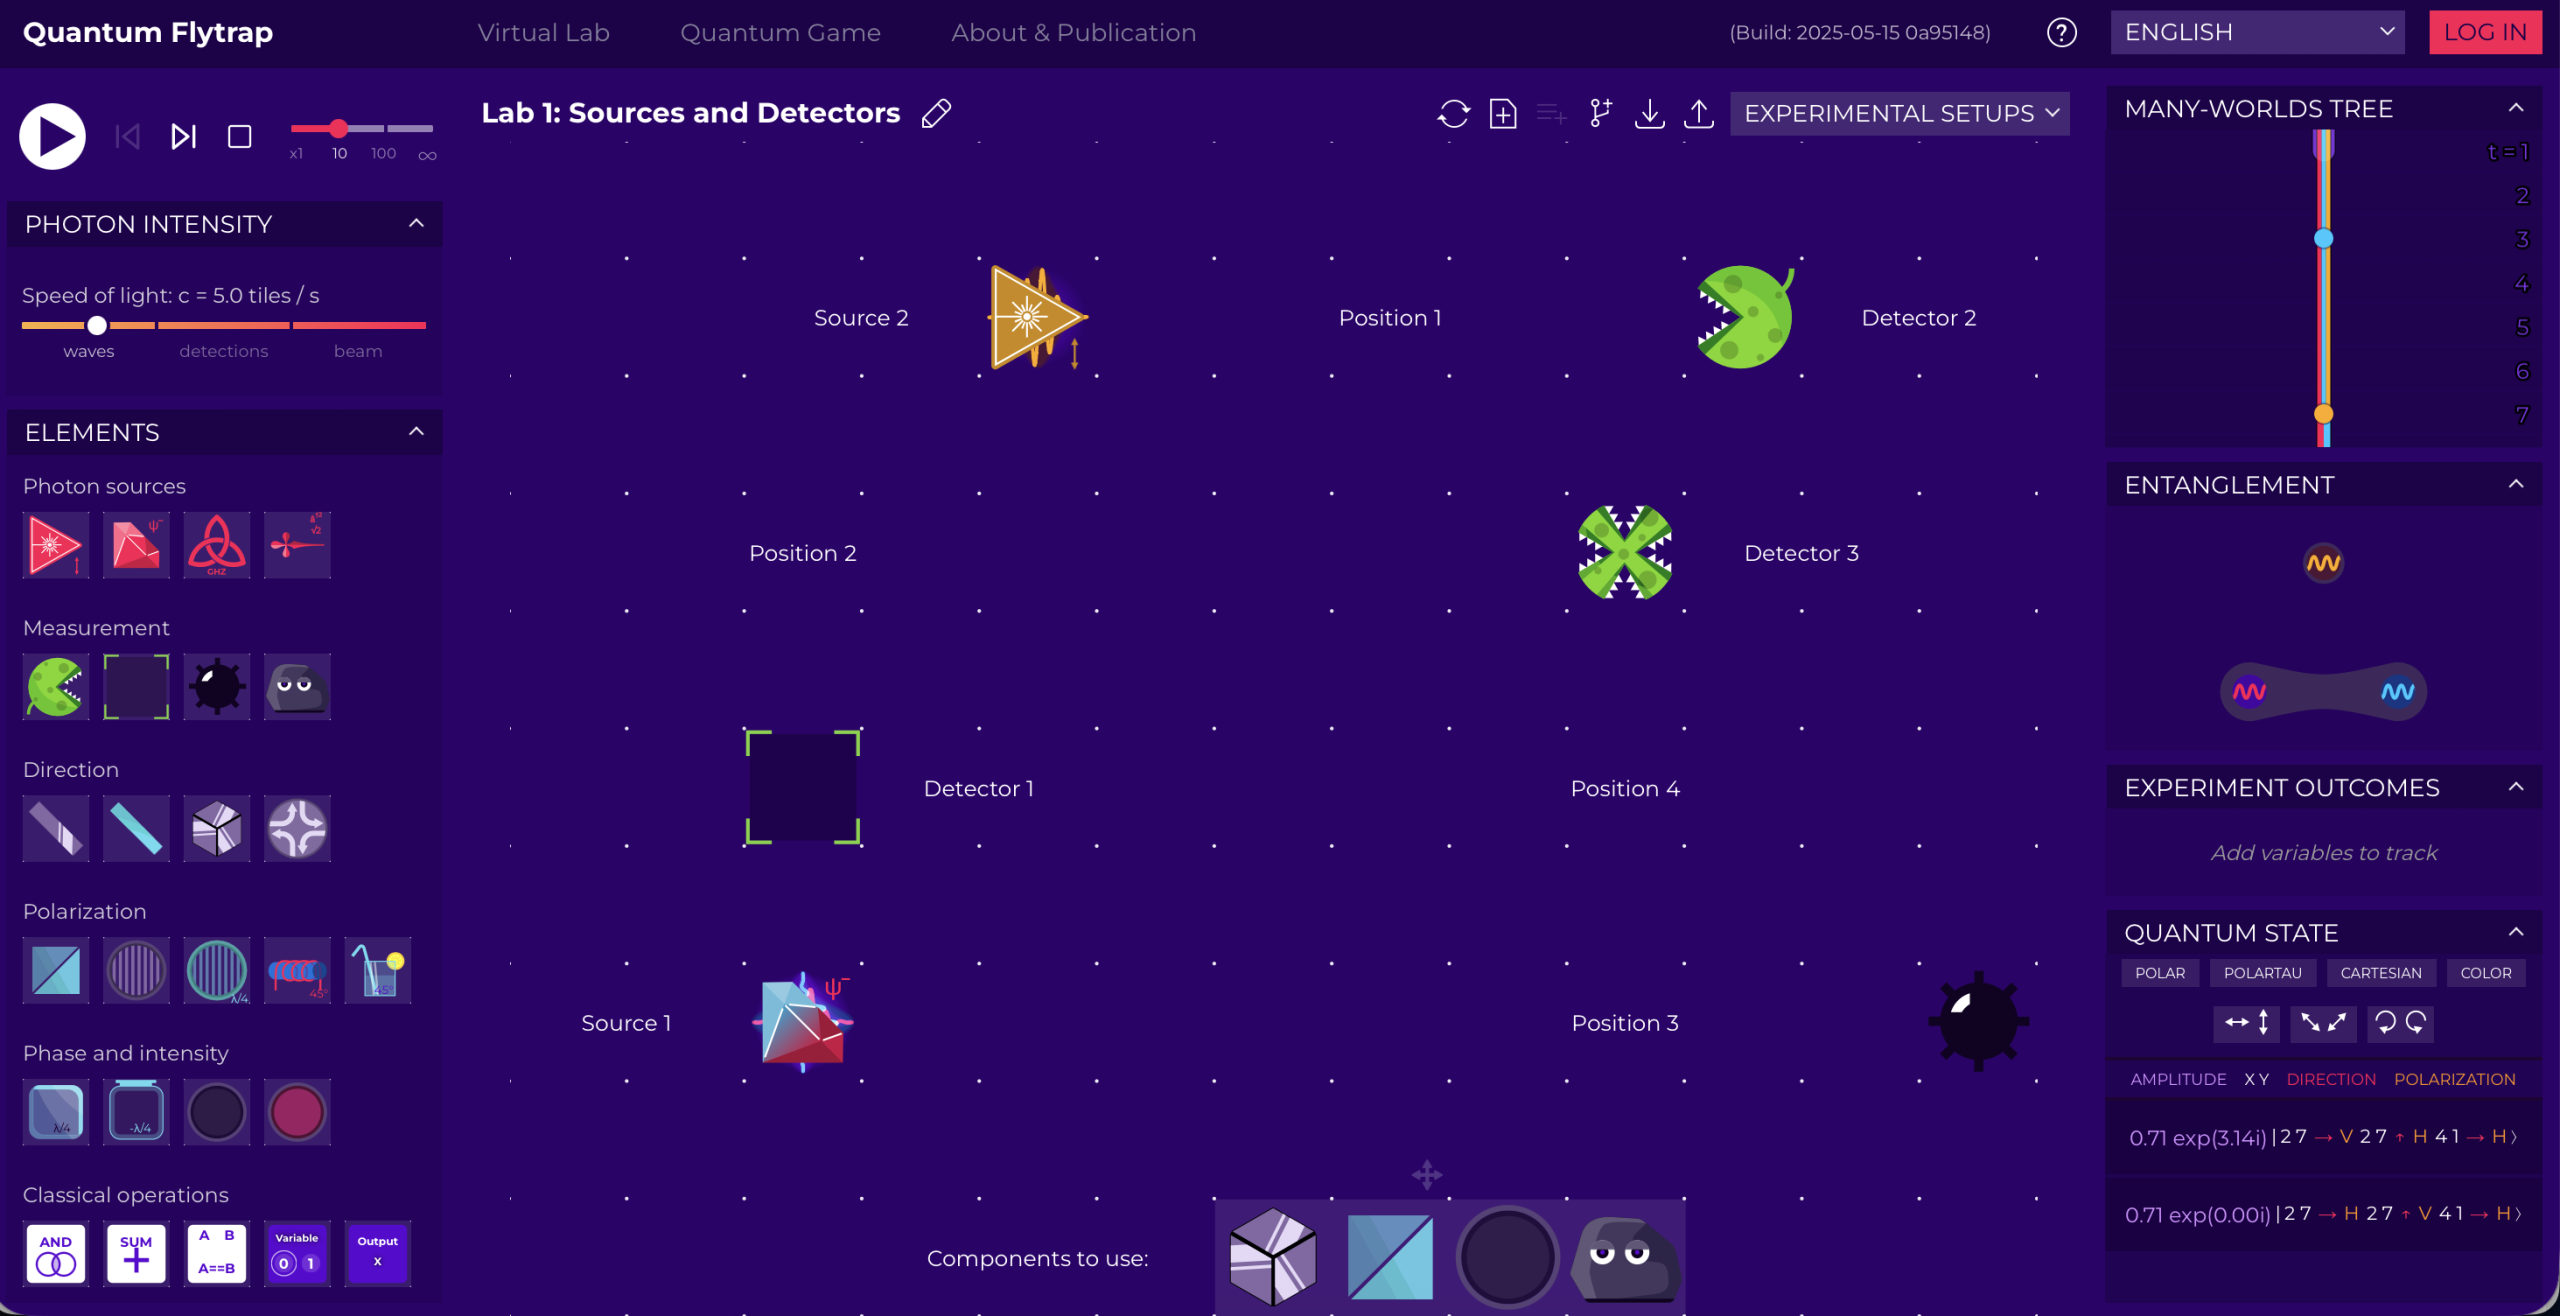
In every mission, the virtual lab should have components and elements already laid out on the optical table, ready for you to delve right into the mission!
This image below is similar to what you should be able to see when reaching the virtual lab in any mission: both left and right sections are visible, and in the central area (the optical table) some components —they are different every mission— are already laid out for you.

What if it's not?

Sometimes the virtual lab likes to change... and the components might not be ready on the table just yet.
Worry not! You're given the opportunity to build up the optical table right as if you were in a real lab!
You can
- Dive right into the experiment: access the sandbox, and select the predefined mission;
OR - Get the full real lab experience and recreate the table from scratch, by picking and moving the components yourself!
Remember that if you want to carry on with the Photonic Trail and unlock all the missions, you need to discover the passcodes related to each specific mission!
Select predefined missions: Sandbox
You will access to an empty optical table and fill it with the components required for a specific mission, or with anything you'd like to experiment with!
1. Click on "Quantum Game" at the top of the virtual lab

2. Select the Sandbox option, by clicking on the ∞ box

3. Click on "Experimental Setup" from the bar at the top.
From the list, select "Publicly Shared Experiments", as you will be able to find our experiments in there, along with all the experiments ever created and shared by users in the virtual lab.

4. Use the filter and type "Photonic Trail" as keyword, to find specifically ours.
Select the mission you would like to have prepared for you on the optical table in the virtual lab, click on it... and there you have it!
Ready, set, go!

Remember that you will always need your passcode to access all missions, even the ones you had already unlocked!
Recreate your missions
If you prefer to be in charge of the setup, which optical table would you like to recreate?

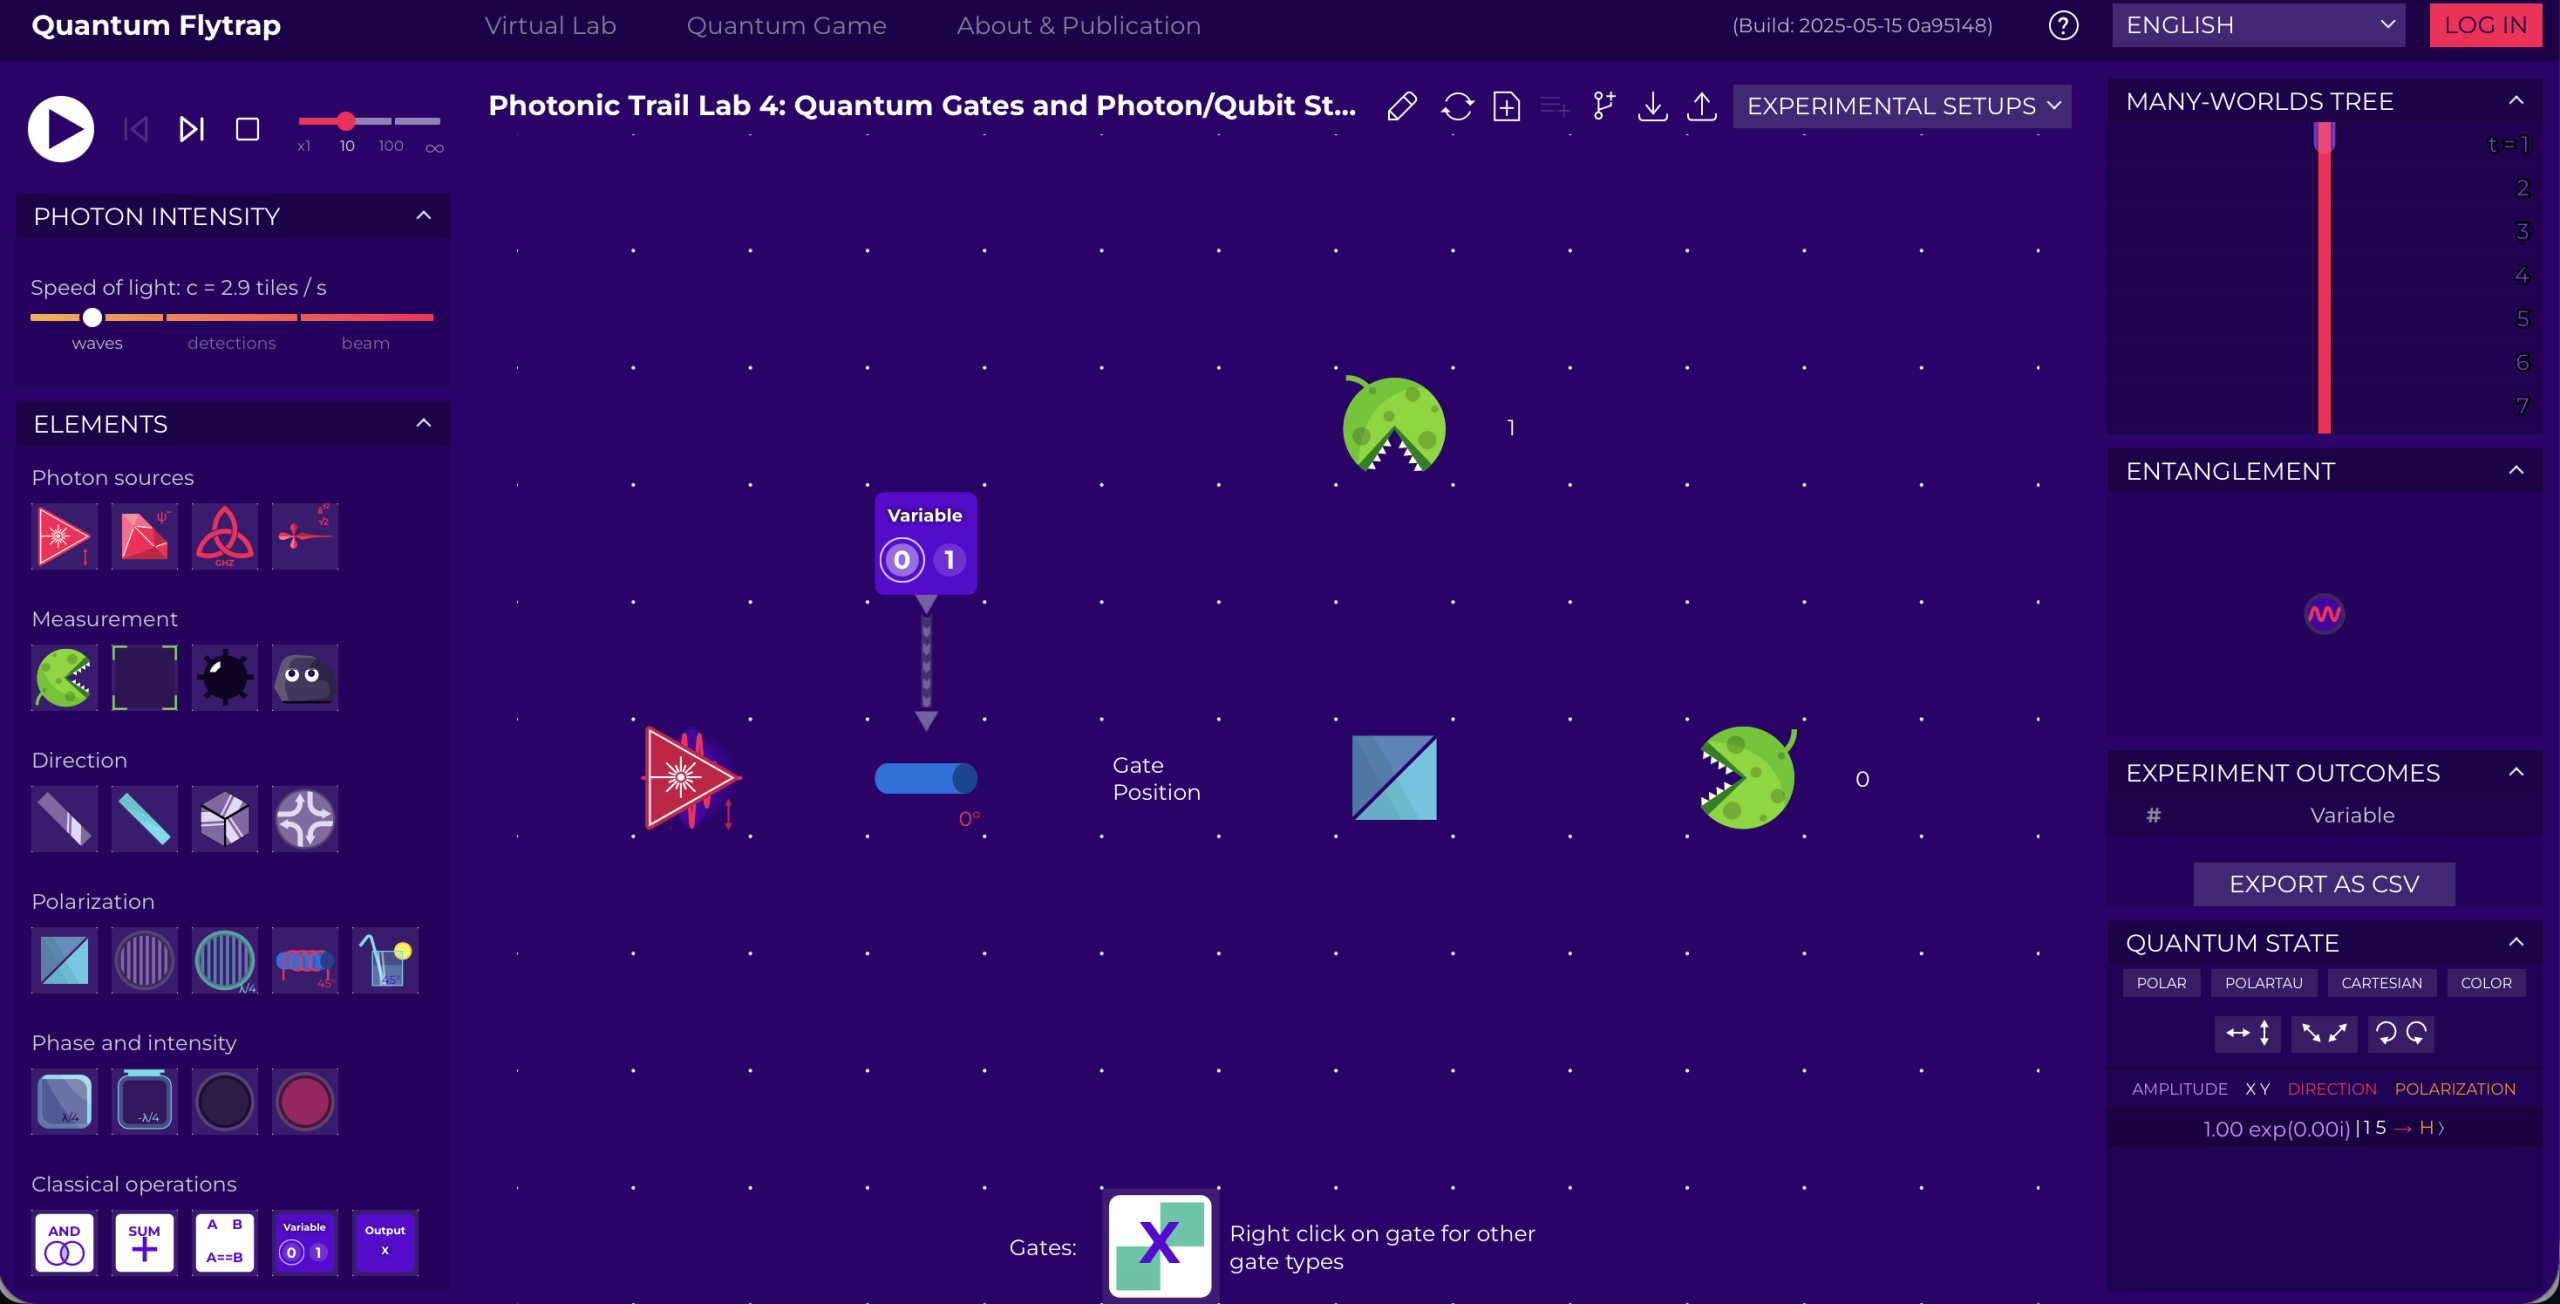
- the Faraday rotator — the one already laid out is set at 0º in both rotation and polarisation setting. Part of the experiment revolves around these settings, so test them away!
- the Quantum gate — you will find it on the Elements panel, if you scroll down a tiny bit. Play with its settings and see for yourself the outcome.
- The Variable — once it's on the optical table, use the small triangle below the component and drag it down to link it to the Faraday rotator previously laid — hint: also in here you might be required to use specific settings of the component in order to solve the mission.
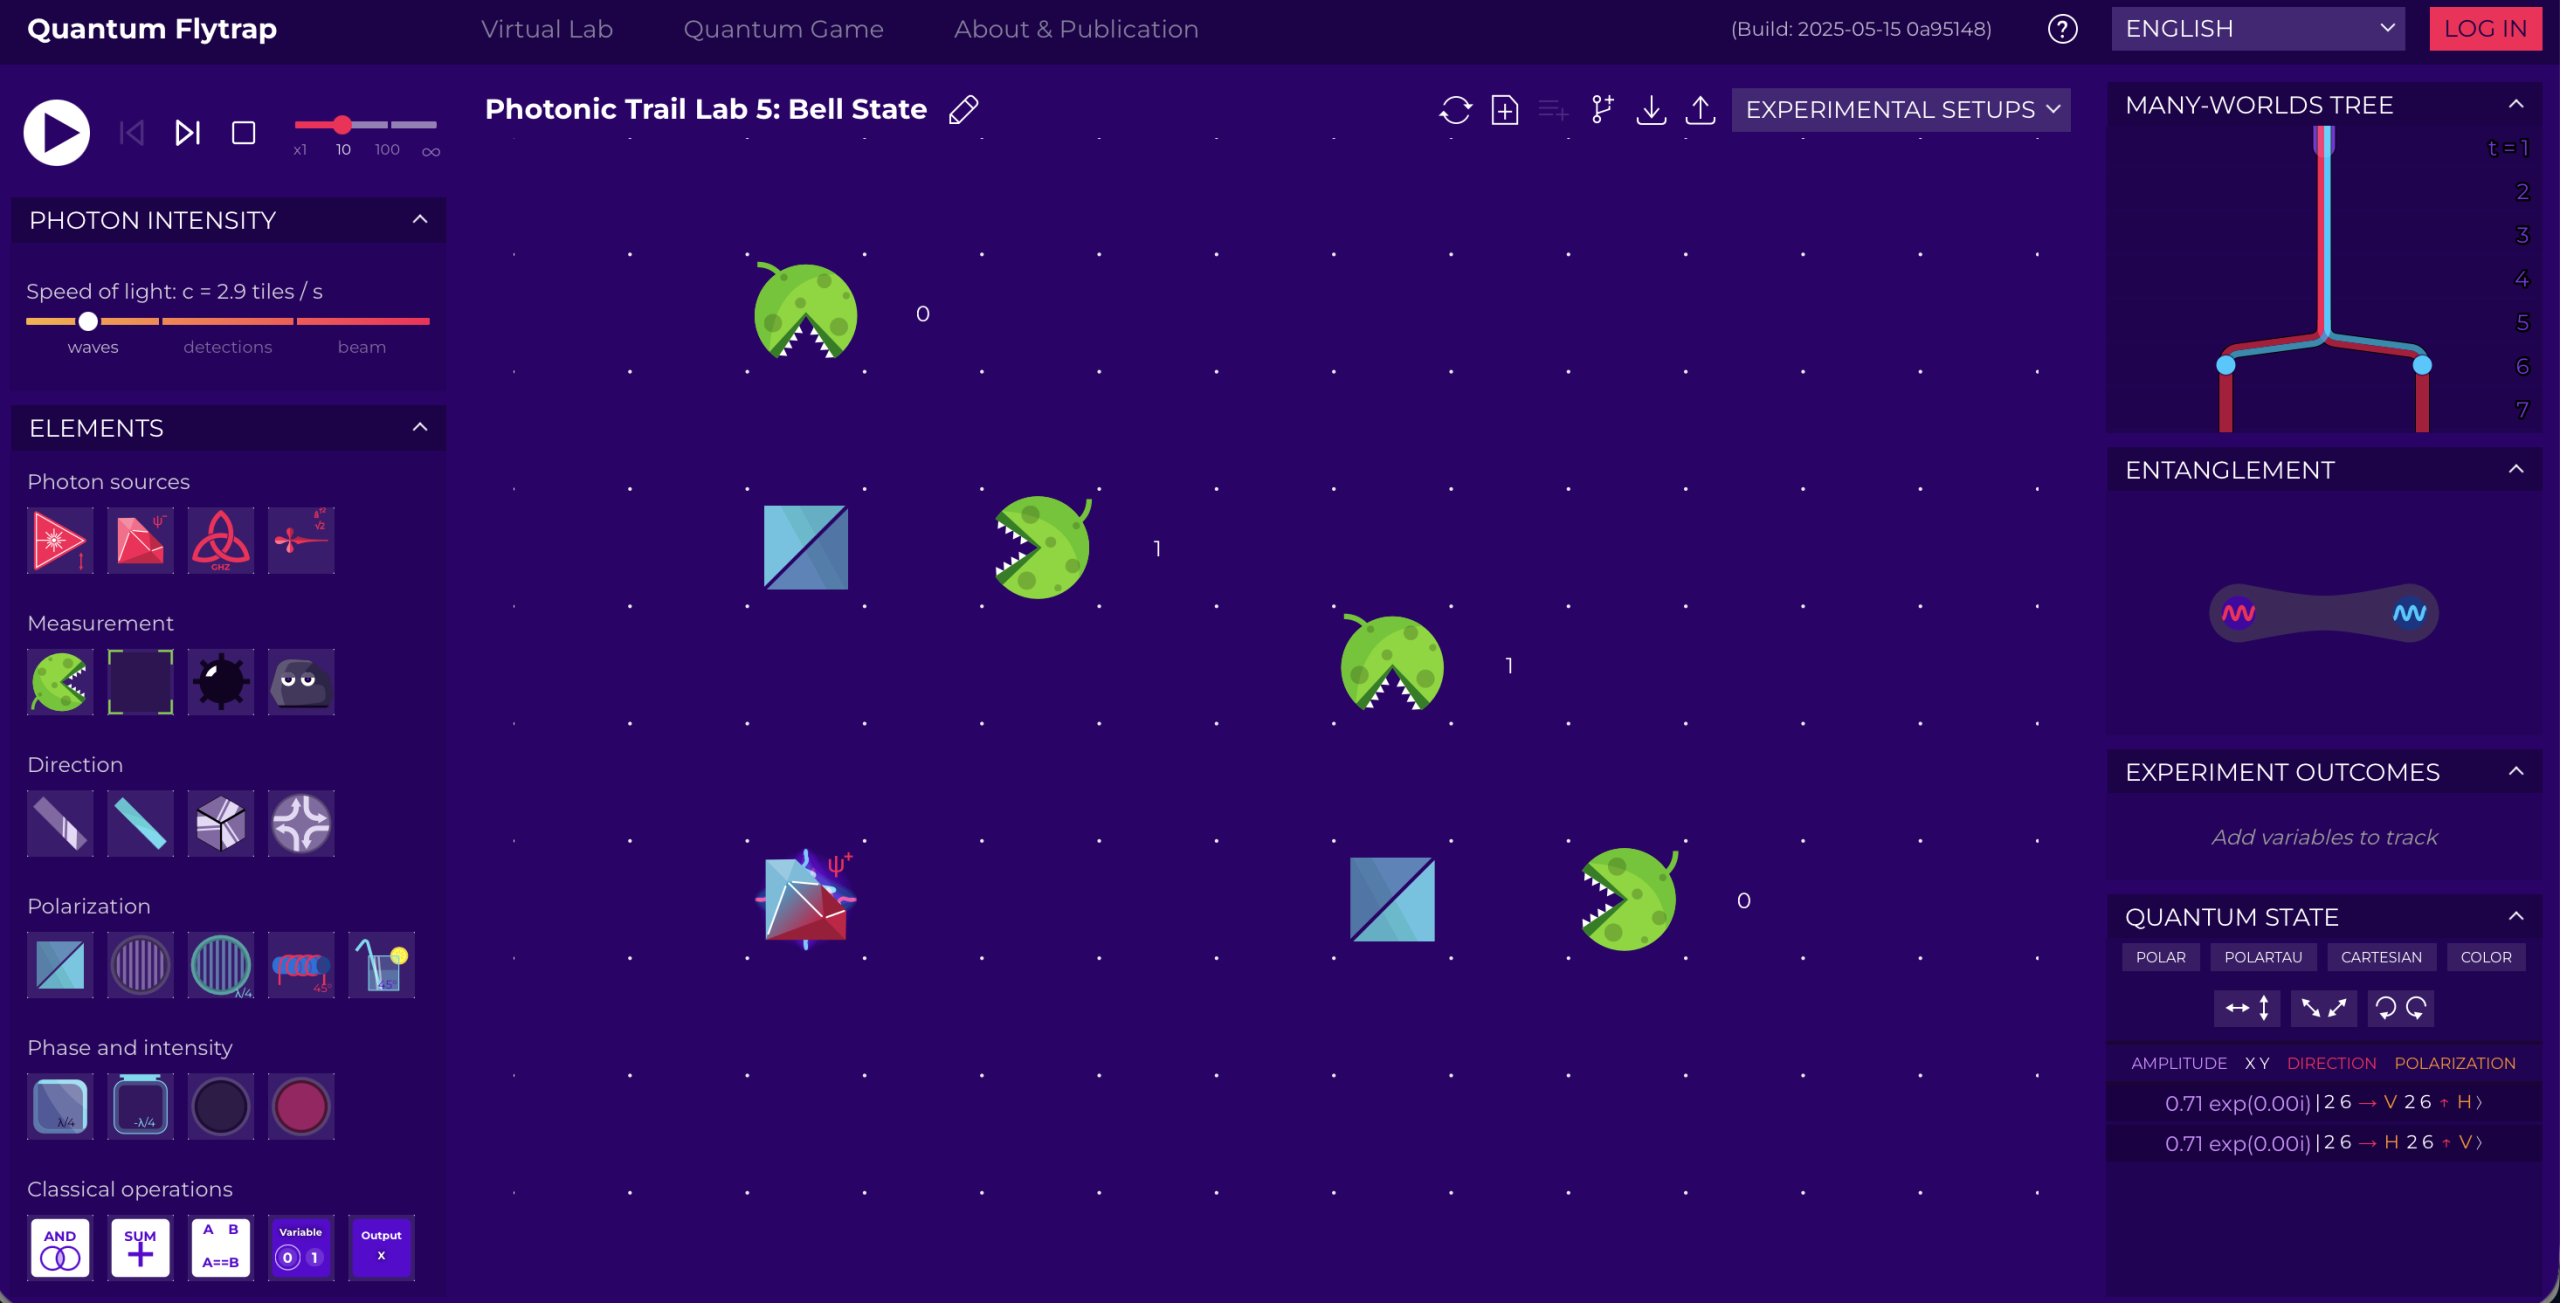
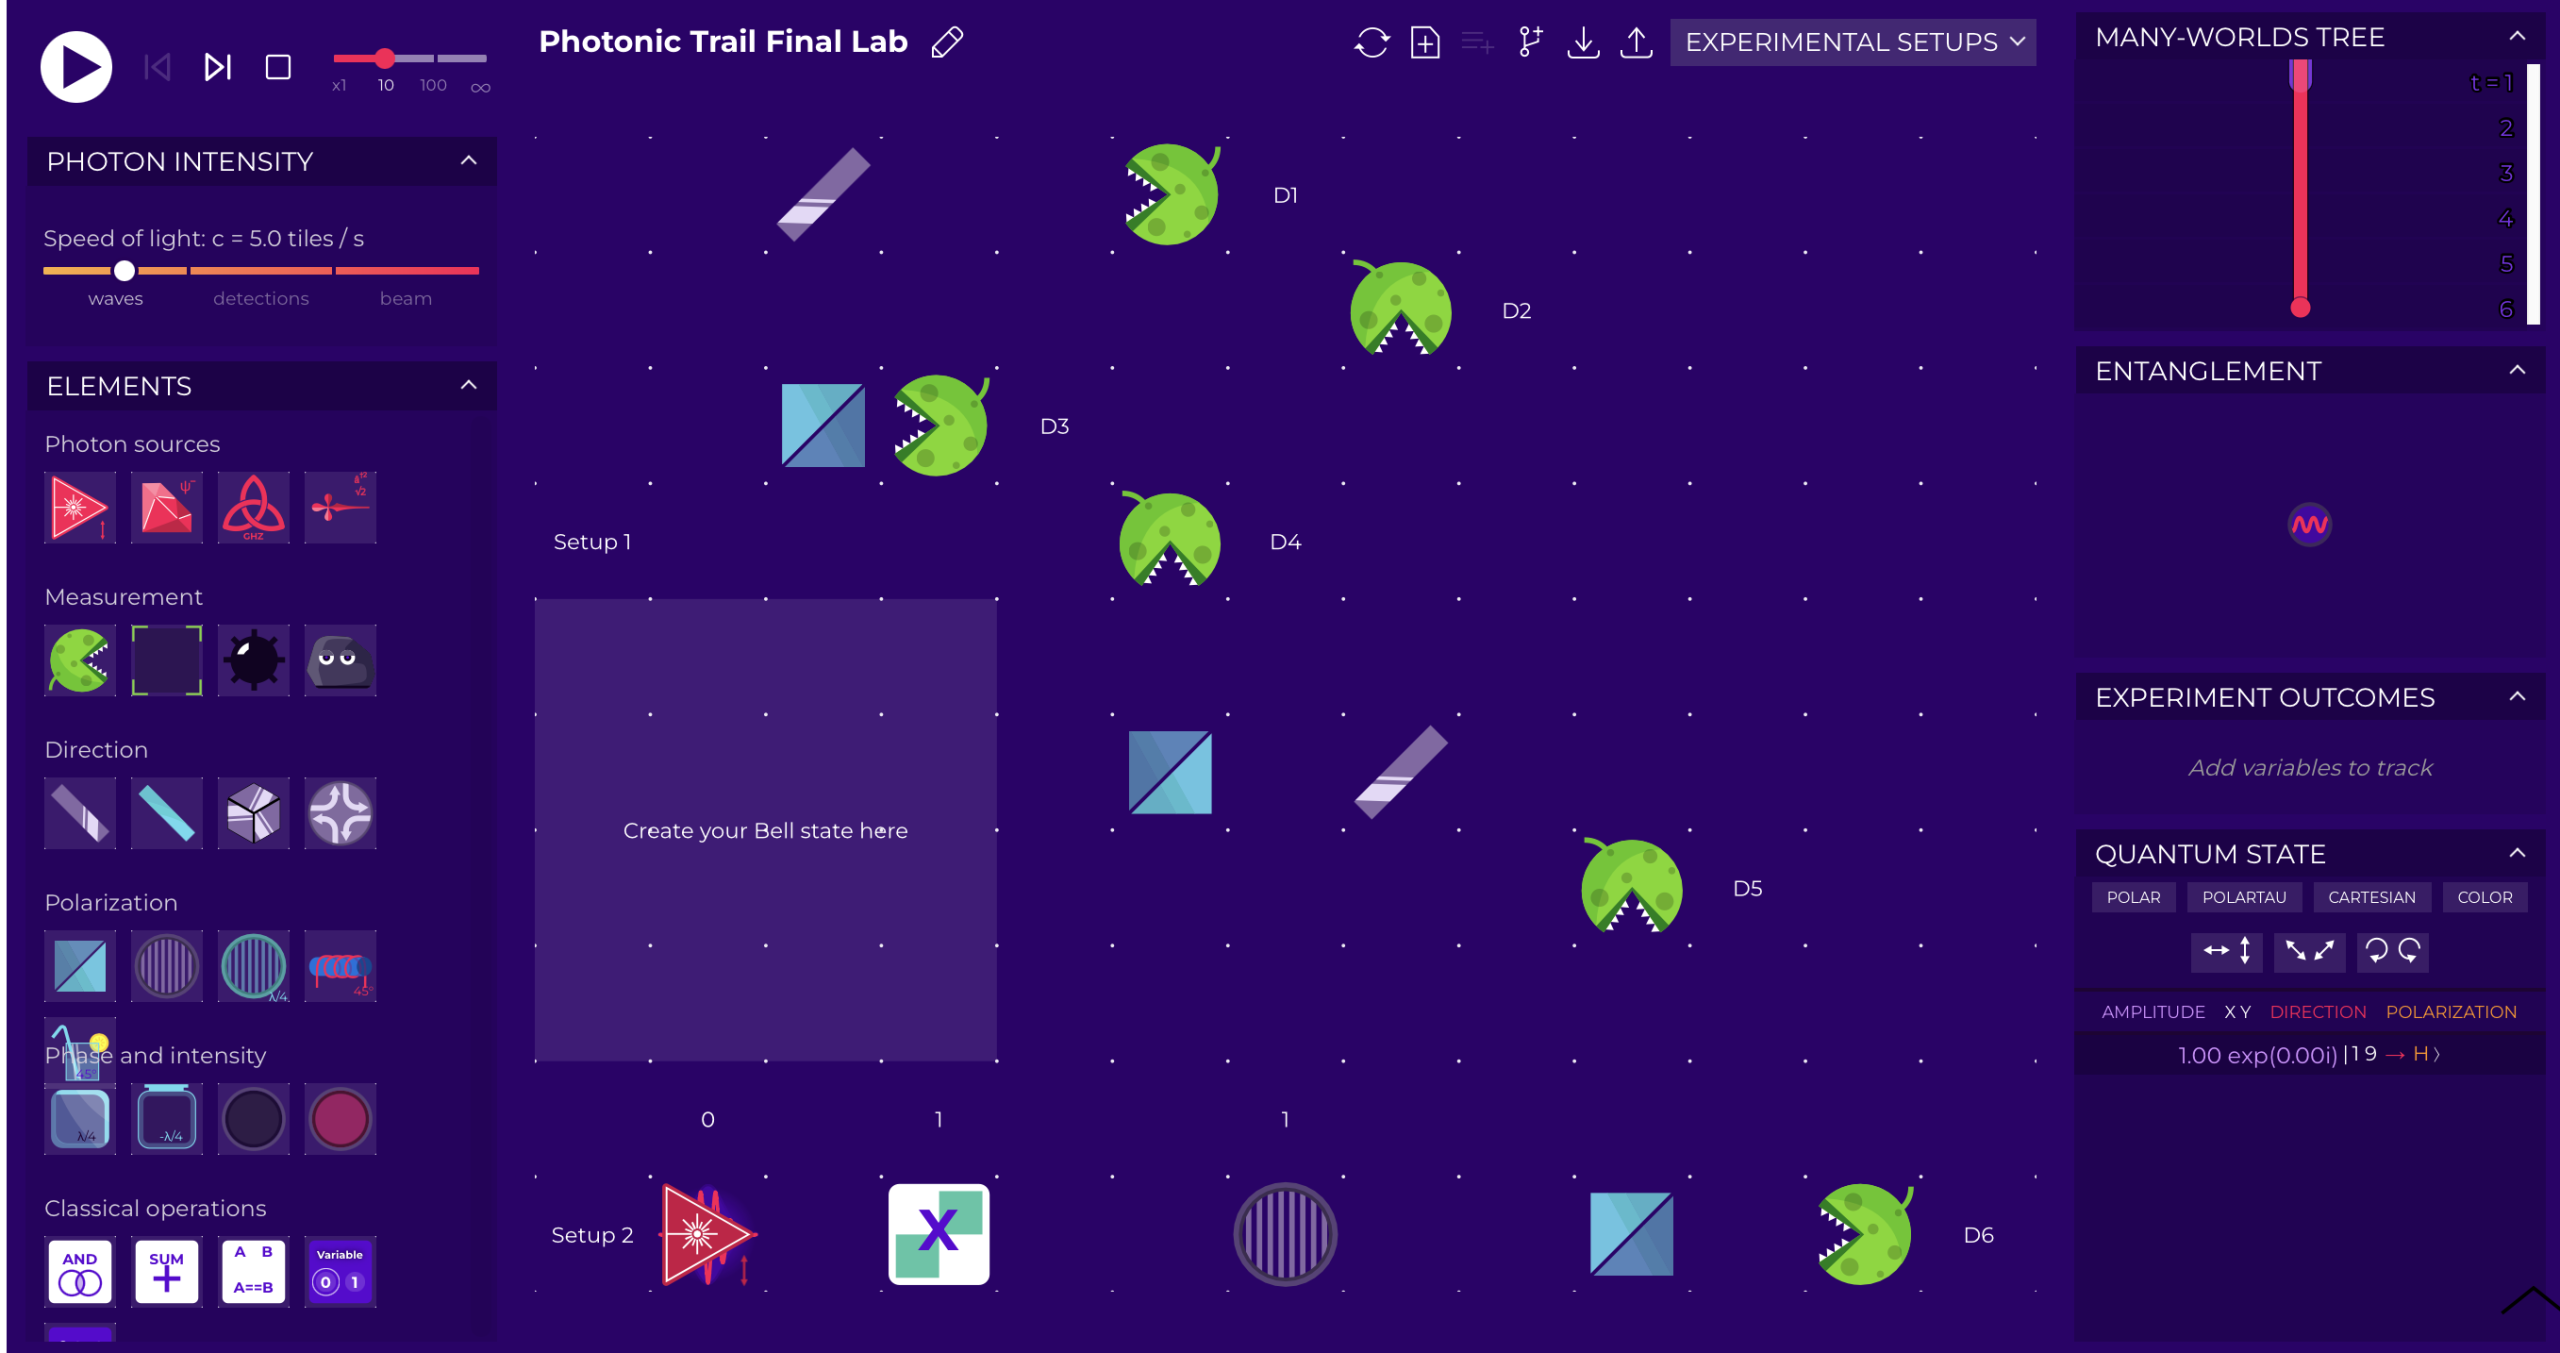
For this specific mission, given its peculiarity, we suggest to use the Sandbox version where the components will show up exactly as planned and the solution will appear inside the lab as soon as you succeed in your mission.
But if you really wish to recreate it yourself, in order to do so, you need to place in their rightful locations all the components that you can see in the image above. The lighter box labelled "Create your Bell State here" is not necessary to reproduce, but it serves as a reference for you to know where you will need to place additional components to solve the mission.
Select now the mission to resume your journey!
(Remember that you need your passcode to access missions 2, 3, 4, 5, and 6)
If you want to go back to the Photonic Trail Home Page, click the button below
Contact
Social
Menu
© 2020-2026 Algorithmiq QPlayLearn. All rights reserved.